Las Vegas Paiute Golf Resort

Verified
Current Time: Sep 19, 2024 15:49 PM
  • 0 (0 Reviews)

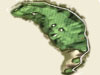
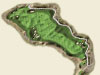
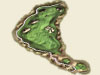
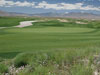
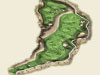
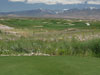
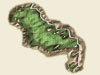
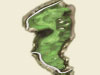
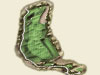
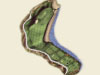
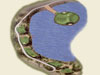
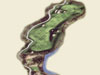
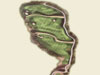
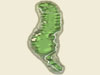
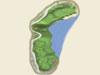
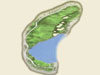
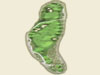
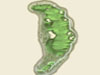
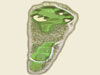
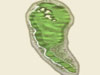
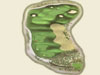
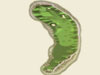
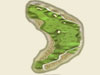
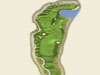
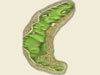
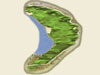
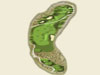
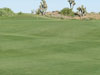
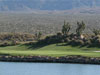
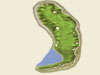
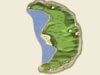
Wolf Course Las Vegas Paiute Golf
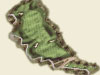
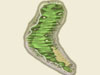
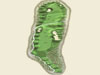
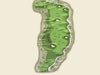
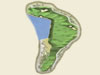
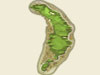
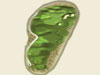
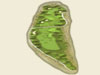
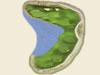
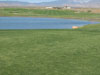
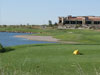
PAIUTE GOLF COURSE

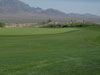
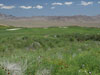
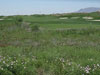
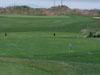
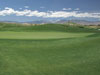
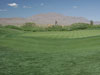
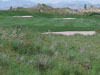
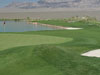
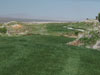
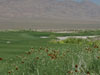
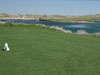
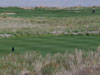
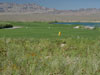
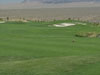
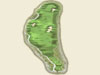
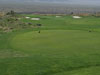
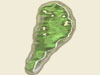
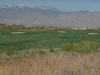
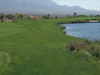
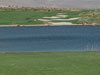
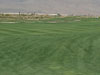
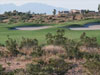
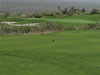
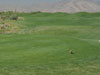
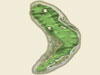
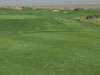
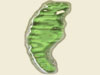
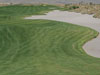
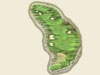
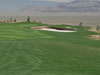
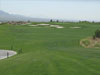
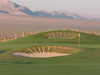
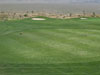
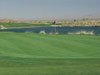
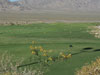
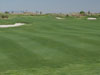
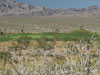
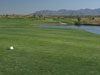
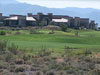
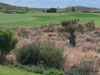
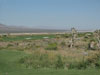
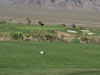
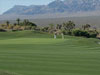
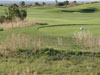
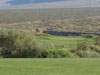
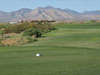
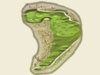
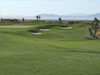
        Resting in the undisturbed beauty of the Southern Nevada desert at the base of the picturesque Spring Mountains lies a golfing experience like no other...The Las Vegas Paiute Golf Resort. Three magnificent championship golf courses, conceived and designed by world-renowned architect Pete Dye. Enjoy the natural serenity and tranquility that only the Las Vegas Paiute Golf Resort can offer.


Wolf Paiute Course

The newest and most-difficult layout, howls at 7,604 total yards and is the longest course in Nevada. It promises an amazing golf experience, thanks to its length, the beauty of its natural desert surroundings, and its stunning island green on the fifteenth hole. Annika Sorenstam and Karrie Webb officially opened the course by competing in Shells Wonderful World of Golf and shot 65 and 64 respectively. Golfers of all skill levels can come take a bite out of the infamous WOLF by tempering the challenge with five tee options at various yardages.


Hole #1
Par 4
277-433 Yards

Slight dogleg left par 4 with more room to the right than it looks for your tee shot. Be accurate with your second shot to this slightly elevated green.


Hole #2
Par 4
259-412 Yards

Short dogleg left par 4 that can be reachable by the long hitter when playing downwind. The average players should position themselves off the tee leaving a full shot in.


Hole #3
Par 5
412-580 Yards

Straightaway par 5 that will require a long and accurate tee shot to go for the green in two. Be accurate when approaching the green and do not go long, a deep pot bunker lurks behind the green.


Hole #4
Par 3
137-223 Yards

Long par 3 to an elevated green requires an accurate tee shot to avoid the bunkers on the left, the slope to the right and the waste area behind the green.


Hole #5
Par 3
278-413 Yards

Dogleg to the right par 4 that requires a well-placed tee shot to avoid the bunkers on the right and left. Make sure you have the correct distance for your shot into the green that slopes away.


Hole #6
Par 5
389-537 Yards

A gambling hole creating a risk reward factor. The safe play is to the right leaving a short approach into a shallow green. But, the green is reachable with a long courageous drive over the desert.


Hole #7
Par 4
332-495 Yards

A long par 4 that plays uphill, very important to stay left of the bunkers off the tee. Use one more club for your second shot to the uphill green.


Hole #8
Par 3
123-206 Yards

Aim left on this downhill par 3 to avoid the waste bunker forty feet below the green to the right. A smart tee shot is to the left part of the green and let the slope push it back to the center.


Hole #9
Par 4
328-496 Yards

Dogleg right par 4 with a premium put on a well-placed tee shot to the center of the fairway. Make sure you pick the right club for your second shot into a long two-tiered green which is well bunkered.


Hole #10
Par 5
440-568 Yards

Reachable par 5 as long as you avoid the fairway bunker in the middle of the fairway with your tee shot. If you cannot reach the green in two, leave a full shot in for your third.


Hole #11
Par 4
244-386 Yards

A short par 4 that requires a long iron or fairway wood to a generous landing area. An accurate second shot is needed to this shallow green that is guarded by a large front bunker.


Hole #12
Par 3
121-209 Yards

Long par 3 over water that offers a bail out area to the left. You have a little room to be short in the bunker that guards the whole front of the green.


Hole #13
Par 5
429-563 Yards

Straightaway par 5 that requires a long tee shot over the fairway bunker or a fairway wood to stay short. An accurate shot into an elevated two-tiered green is needed to avoid the drop off on the right and bunker on the left.


Hole #14
Par 4
342-492 Yards

Sharp dogleg right par 4 and you can cut some of the distance off the tee by taking it over the waste area on the right. A difficult second shot two a two-tiered green guarded by six bunkers, a four is a very good score.


Hole #15
Par 3
98-182 Yards

A true island green par 3, avoid the water and land your tee shot on the generous sized green. Once you're on the green safely the fun begins on this three-tired green.


Hole #16
Par 4
306-427 Yards

Slight dogleg to the right and uphill par 4 that an errant tee shot will find one of the well-placed fairway bunkers. Hit one extra club to this elevated green.


Hole #17
Par 4
281-486 Yards

risk and reward par 4 that requires a decision off the tee. You need to hit a long tee shot off the tee to the right hand side to avoid the arroyo that runs through the middle of the fairway, if you lay up you will be forced with a long second shot that needs to carry the second arroyo.


Hole #18
Par 4
334-496 Yards

A long par 4 that is set up by keeping your drive out of the water down the right side. Your second shot will play downhill to a green that is protected by bunkers short and to the right. A safe second shot is short left and let it feed on to the green.


Sun Mountain Course Details


Shining at 7,112 total yards, is the tamest of the courses but the holes are every bit as good. A kinder, gentler Dye design, it�s depicted by natural rolling terrain and enchanting scenery. Many golfers hail the Sun as their favorite because they feel like they are on the edge of nature due to the location of the course being completely away from the resort's interior. The 12th is brilliant even on a cloudy day because of the monstrous mountain backdrop, indigenous desert landscape, and sweeping slope changes, which will advise a player to think before swinging. Golfers will warm to the experience on the Sun since the course also offers four tee options.


Hole #1
Par 4
382-454 Yards

Framed by Yucca and Joshua trees, this hole sets the tone for a memorable outing. Favor the left side of this long downhill Par 4.


Hole #2
Par 4
289-379 Yards

With a spectacular view of the Sheep Mountain range, this short downhill Par 4 requires only a fairway wood off the tee to set up an easy approach.


Hole #3
Par 5
458-558 Yards

generous landing area on this Par 5 allows the golfer a chance to swing away. However, keep your shot right for the best approach to the green.


Hole #4
Par 3
123-206 Yards

This demanding Par 3 requires a long carry over water. With a bunker right and little bail out to the left, there is not much room for error. Hit it and hope.


Hole #5
Par 4
315-389 Yards

Another long carry over water awaits at this uphill Par 4. The left side of the fairway is the safe place to be and will setup an easier shot into an undulating green.


Hole #6
Par 4
348-436 Yards

A classic Pete Dye hole framed with his trademark railroad ties. Keep your tee shot right, leaving you the safest approach into a green heavily bunkered on the left.


Hole #7
Par 5
392-530 Yards

With native desert running down the left side and bunkers right, this double dog-leg Par 5 is reachable in two for the longer hitter.


Hole #8
Par 3
118-204 Yards

Your shot must carry the native desert to a green heavily bunkered on the left. The large but shallow green can leave a long putt.


Hole #9
Par 4
346-449 Yards


Bite off as much of the native desert as you can on the tee shot. Ball left to the right side of the fairway will have a longer approach to a shallow, tricky green.


Hole #10
Par 4
277-358 Yards

Short Par 4. Receptive fairway will set up birdie opportunities.


Hole #11
Par 5
443-545 Yards

You will need all you brought in your bag for this long Par 5 that meanders its way uphill to a plateau green. A shallow green makes correct club selection important.


Hole #12
Par 4
369-465 Yards

This longest and slightly uphill Par 4 will reward the longer player. Without a long drive, a long iron will await your approach. The back left lobe of the green is Dye's favorite pin position. Good luck.


Hole #13
Par 4
345-426 Yards

Another long drive is necessary to set up an approach onto a tricky, tiered green.


Hole #14
Par 3
144-219 Yards

A great Par 3 with plenty of length. The sod-faced bunker off the front of the green appears intimidating but leaves plenty of room.


Hole #15
Par 4
274-365 Yards

Take your chances on this short par 4. The safe tee shot is to the left but will leave you with a forced carry on the approach. Those attempting to drive the green must find the upper fairway pad guarded by bunkers left and the native desert right.


Hole #16
Par 5
400-527 Yards

The wide-open tee shot is the only break given on this hole. Second shot must carry a pot bunker in the center of the fairway.


Hole #17
Par 3
110-198 Yards

Although this is the shortest hole, a long, difficult green awaits. The back of the green breaks away and is difficult to hold.


Hole #18
Par 4
333-404 Yards

An excellent finishing hole with water on the left and bunkers on the right. A lofty shot will be necessary to carry the pot bunker in front of the green.

� � �

Snow Mountain Course Details


Paiute�s original course, storms in at 7,164 total yards, it has wide rye grass fairways, seven holes with water hazards, and a progressive layout�meaning there are no parallel fairways. Featuring traditional Dye railroad tie-decorated bunkers and dogleg finishing holes � some golfers still feel the original is the best of the three. The 16th, a par 3, is a delight and the 18th, which flanks the Clubhouse, presents a welcomed challenge with water hazards and a compelling yardage. Various skill levels will feel the �cool you� that comes with the Snow since the course has four tee options.


� Hole #1
Par 4
281-389 Yards

� The opening tee shot provides plenty of bailout area to the right, but a ball placed down the left side will have a better angle for your approach. Don't go long on this green.


Hole #2
Par 4
306-426 Yards

A split fairway gives the golfer the option of carrying the nativedesert to a fairway tongue that will shorten the approach.


Hole #3
Par 5
446-557 Yards

A reachable Par 5 for the long hitter. From the first landing area, the golfer must decide which route to follow. The safe play is to the left but, depending on the wind, a courageous player may go for the long carry over the water to the green.


Hole #4
Par 3
106-180 Yards

With water right, the left side offers a generous bailout. Beware of being above the hole if the pin is back right.


Hole #5
Par 4
342-458 Yards

Slightly uphill and the longest Par 4, this demanding hole will reward the longer player. Bite off all you can from the left side or a long iron will await your approach. The green is wide open but be aware of the native desert left of the green.


Hole #6
Par 5
431-562 Yards

Accuracy is important on this long, narrow Par 5. The hole tightens considerably after the first landing area. The greenside bunker is farther off the green than it appears. The tendency is to underclub your approach.


Hole #7
Par 4
226-337 Yards

Take your chances on this short Par 4. The safe tee shot is to the left, but those attempting to drive the green must carry the farthest right bunker which is dangerously close to the native desert.


Hole #8
Par 3
138-198 Yards

The golfer's shot must carry the native desert to a green heavily bunkered on the right. The bailout area left appears safe but can leave you with a difficult chip to the green.


Hole #9
Par 4
359-421 Yards

This hole requires an accurate drive avoiding water on the right and bunkers on the left. Grass lows left and behind the green make for difficult chipping.


Hole #10
Par 4
306-418 Yards

With water from tee to green, a tee shot flirting with the left side will reward the player with a shorter approach to the green.


Hole #11
Par 5
449-611 Yards

A generous landing area allows the golfer a chance to swing away. However, the second shot requires more accuracy to a landing area bunkered on both sides. The plateaued green is shallow so correct club selection is important.


Hole #12
Par 4
291-427 Yards

The tee shot must carry the native desert and avoid the bunker right to set up your approach to an undulating green guarded by bunkers on the right.


Hole #13
Par 4
259-342 Yards

A gambling hole creating a risk reward factor. The safe play is to the right leaving a short approach into a shallow green. But, the green is reachable with a long courageous drive over the desert.


Hole #14
Par 3
115-192 Yards

The wind direction will play a big factor in club election. There is a large bailout on the left side.


Hole #15
Par 4
361-456 Yards

Place your tee shot toward the fairway bunker long left for the best angle into the green.


Hole #16
Par 3
119-198 Yards

With a spectacular view of Sheep Mountain, this Par 3 requires a long carry over water. The bailout area right offers a reatively easy up and down. The greenside bunkers normally don't come into play.


Hole #17
Par 5
455-529 Yards

A long, uphill right to left Par 5. Keep your second shot left, it is wide open and will leave you with a better angle into the green.


Hole #18
Par 4
351-445 Yards


A difficult finishing hole with water on the left from tee to green. Length off the tee will pay off because approach requires a lofty shot carring water into the green.


Address: 10325 Nu-Wav Kaiv Blvd., Las Vegas, NV, 89124-8411

Phone: 702-658-1400 , 800-711-2833

Website: http://www.lvpaiutegolf.com